Draining a well pressure tank is an essential maintenance task that ensures the longevity of your well system and maintains water quality. This step-by-step guide will walk you through the process, ensuring you can complete this task efficiently and safely.
Why Drain Your Well Pressure Tank?
Over time, sediment and minerals can accumulate in your pressure tank, affecting water pressure and quality. Draining the tank helps remove these deposits, prevents bacterial growth, and ensures your system operates efficiently.
Safety First
Before starting, safety is paramount. Ensure the power to the pump is turned off at the breaker to prevent any electrical hazards. Also, wear appropriate personal protective equipment, such as gloves and goggles, to protect against water splashes and debris.
How to Drain a Well Pressure Tank
Step 1: Turn Off the Power
Locate the circuit breaker or switch that controls power to the well pump and turn it off. This step prevents the pump from activating while you are working, ensuring your safety and protecting the pump from damage.
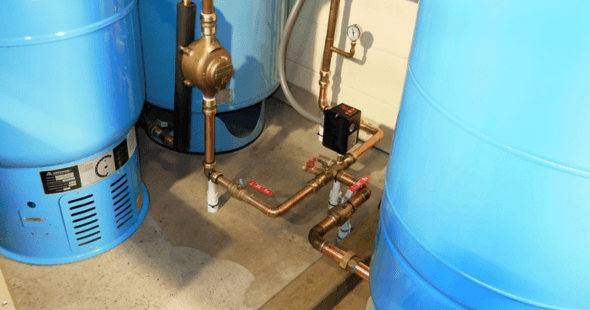
Step 2: Close the Supply Valve
Find the valve that controls the water flow from the well to the pressure tank. This valve is typically located close to the pressure tank itself. Turn it clockwise to close it, stopping water from entering the tank during the draining process.
Step 3: Connect a Hose
At the bottom of the pressure tank, you’ll find a spigot or drain valve. Attach a garden hose to this valve. Ensure the hose is securely fastened to prevent leaks. Lead the other end of the hose to an area where it’s safe to discharge water, such as a garden or drain.
Step 4: Open the Drain Valve
With the hose in place, slowly open the drain valve by turning it counterclockwise. Water will begin to flow out through the hose. The draining process can take several minutes to an hour, depending on the size of your tank and the amount of sediment.
Step 5: Flush the Tank
After the water starts to run clear, which indicates most of the sediment has been removed, it’s a good idea to flush the tank with fresh water. To do this, briefly open the supply valve to allow new water into the tank, then close it again and continue draining. This process helps remove any remaining sediment.
Step 6: Close the Drain Valve
Once the tank is fully drained and flushed, remove the hose and securely close the drain valve by turning it clockwise. Make sure it’s tightly closed to prevent leaks.
Step 7: Turn the Power Back On
Before turning the power back on, ensure the supply valve to the tank is fully open. Then, go back to the circuit breaker or switch and turn the power to the well pump back on. The pressure tank will begin to refill with water.
Step 8: Check for Leaks
As the tank refills, check around the tank, the supply valve, and the drain valve for any signs of leaks. If you find a leak, turn off the power and water supply again to address the issue before proceeding.
Conclusion
Draining your well pressure tank is a straightforward process that plays a crucial role in maintaining your well system’s efficiency and water quality. By following these steps, you can ensure your well pressure tank operates at its best, providing your home with clean, reliable water. Regular maintenance, including draining the tank, can also extend the lifespan of your well system, saving you money and hassle in the long run. Remember, if you encounter any difficulties or are unsure about any step, don’t hesitate to consult a professional.